Reflected XSS in synnefoclient for Synnefo IMS 2015

Information

=================================
#Vulnerability type: Cross Site Scripting (XSS)

#Vendor: http://www.synnefoims.com/

#Product: Synnefo Client for Synnefo Internet Management Software

(IMS) 2015 (http://www.synnefoims.com/products.html)

CVE Reference:

=================================
CVE-2015-8247

Technical Details:

=================================
A reflected cross site scripting (XSS) vulnerability was found in synnefoclient

for Synnefo IMS 2015. The vulnerability has been discovered in the plan_name

parameter on the request to fetch the package details for the logged in user.

Request method is GET.

Vulnerable Parameter

=================================
plan_name

Sample Payload with URL

=================================

sys

Exploitation Technique:

==================================
Remote

Severity Level:

==================================
High

Timeline

=================================
-Vendor notified – Tue, 27 Oct 2015 11:32:21 +0530

-Vendor responded and acknowledged – Tue, 27 Oct 2015 12:27:50 +0530

Credits & Authors

===================================
Aravind C Ajayan

References

===================================

https://web.nvd.nist.gov/view/vuln/detail?vulnId=CVE-2015-8247

http://www.securityfocus.com/archive/1/537099

Adding static and dynamic asset groups in Nexpose

Another level of asset organization in Nexpose is an asset group. Like the site, this is a logical grouping of assets, but it is not defined for scanning. An asset group typically is assigned to a non-administrative user, who views scan reports about that group in order to perform any necessary remediation. An asset must be included within a site before you can add it to an asset group. Only designated Nexpose global administrators are authorized to create sites and asset groups. Asset groups can include assets listed in multiple sites. They may include assets assigned to multiple Nexpose Scan Engines, whereas sites can only include assets assigned to the same scan engine. Therefore, if you wish to generate reports about assets scanned with multiple scan engines, use the asset group arrangement. To add an asset group, click on the ‘Assets’ tab on top and then on ‘Asset groups’.

1

We will go with creating a static asset group first, so click on ‘New static asset group’ in the window that opens up.

2

In the window that opens up, just provide a name for the asset group. I have provided ‘first_group’ as shown in the following screen.

3

As we have a name, we need to add the required assets to this group now. Click on the ‘Assets’ tab to the left and then click on ‘Select assets’ in the window that opens up.

4

You will get another pop up wherein you have to search asset based on filters and add to your group. You have the option to search by ‘IP address range’,’Name’,’Site’ and ’Operating system’. These filters are very much helpful when you have a large number of assets to manage. Since we only have a few assets as of now, I’ll just click on ‘Display all assets’ button.

5

I have chosen only the first two assets and clicked on ‘Save’. Now click on the ‘Access’ button. Here you have the option to add users, who basically will be given access to this asset group. You can click on ‘Add users’ button to select those users. Since this is a ‘Community Version’ of the product, the total no.of users are restricted to one (the logged in admin user). So I won’t able to add any users there. However you will still be able to save this asset group by clicking on the ‘save’ button.

6

Once you come back to the asset groups page, you will be able the see the group you have created.

7

Similarly you can create a dynamic asset group in Nexpose. As the name suggests the group will be dynamic. It can grow or shrink based on the assets in the system and the criteria you have defined for the group. If you add a new asset in to the system that satisfies the group’s criteria, the group will grow. Same way if you remove such an asset the group will shrink. Click on ‘New dynamic asset group’ button to create a new dynamic asset group.

8

A filter basically defines the criteria that an asset has to satisfy in order to become a member of the group. A dynamic group can have multiple filters. You can use the ‘+’ button to define multiple filters. I will define one filter to see all the Linux boxes we have in system. From the first dropdown I will choose ‘OS’ , second has to be ‘contains’ and in the entry box I’ll type ‘linux’.

9

Now if you click on the ‘Search’ button it will show all assets present in your system that satisfies this filter criteria.

10

Now click on ‘Create asset group’ to create a dynamic asset group with the specified criteria.

11

Provide a name for the asset group like ‘dynamic_asset’. Just click ‘Save’ and your group get created. As I have already mentioned, there is no provision for user management in the ‘Community version’ of Nexpose. In the following screen you will see that our group has been created.

12

Generating reports using Nexpose

Once you are completed with a scan you will have to generate a report on the ‘Audit’ for review purposes or to keep the scan as a record for future references. Nexpose provides you with an easy to use report generation module. Click on to ‘Reports’ tab on top, then choose ‘Create a report’. You should see a screen like below.

1

You can choose from any of the available reporting templates. I have chosen ‘Audit Report’. It’s up to you to decide on whether to go with ‘Audit Report’, ‘Executive overview’ etc. depending on your requirement. At the time of preparing this document, I was using ‘Nexpose Community Edition’. You could create your own reporting templates by clicking on ‘Manage report templates’, if you are using a ‘Nexpose Enterprise Edition’. Scroll down further and you will get to choose the file type for your report.

2

As seen in the figure above, you can choose between either PDF or HTML file formats for reporting.

Scope defines the data that you want to get pulled in to your report. You have three options here.

  • Based on the scan -> Select Scan (here you basically select a site and then a scan within that site.)
  • Based on sites, Assets, Asset groups or Tags -> Its all clear from the terms
  • Based on vulnerabilities -> you can search for particular vulnerabilities based on its CVE-ID and pull out a report.

3

As an example I will give a name like ‘metasploit_report’ for ‘Name’ field. Choose ‘Audit Report’ under ‘Template’. Then will choose the ‘File format’ to be ‘PDF’. Under ‘Scope’ click on ‘Select scan’, which pops up a screen like below

4

Choose ‘Scan_with_authentication’ and click ‘Select Scan’.

5

Choose the only scan we have triggered and click ‘ok’. Once you click ‘OK’ you will come back on to the main reports page. Now we have given enough information for the module to generate a report based on the scan we have selected. Scroll down to the bottom of the page and click on ‘Save & run the report’.

6

In the below screen you can see our report named ‘metasploit_report’ that got generated recently.

7

By just clicking on the name of your report under ‘Report Name’ will open up the report for you (provided you have a PDF reader installed on your machine).

Oracle’s ROWNUM demystified

Hey folks,

I thought to share this piece of information as it might help you guys, if you happen to come across an Oracle database when probing for SQLi. ROWNUM is the villain here. Lately I got hold on a database that has like 5000+ tables worth of juicy information. As you all might be aware that LIMIT won’t work with Oracle, its ROWNUM for Oracle. There were limitations like , I could only fetch one row of data at a time from the tables (that’s why I needed ROWNUM). Filters are in place … so no UNION, ALL and OR kind of keywords. But they left out SELECT. I will come to the payload later on. But this little bitch (ROWNUM) literally made me bang my head on the desk.

From the name ROWNUM, you might think it refers to the number of the row. Like 1 for 1st row, 2 for 2nd row …. and so on. But it isn’t that way. More interestingly ROWNUM is not a keyword like LIMIT, its a column name(pseudo column) in Oracle. They call it the magic column (ref: Oracle.com)

I will explain this with an example. Suppose you have a query like

eg1: SELECT name FROM employee WHERE ROWNUM=1;

The above query will perfectly work and give you the 1st row.

eg2: SELECT name FROM employee WHERE ROWNUM <=5;

This works fine as well. Gets you the first 5 rows. But what if you don’t want the first 5 row ? You will write

eg3: SELECT name FROM employee WHERE ROWNUM > 5;

Have you guys ever tried that ? This will not work.

What if you only want the Nth (N Є {1,2,3,4….N}) row ? You might have a query like

eg4: SELECT name FROM employee WHERE ROWNUM =2;
eg5: SELECT name FROM employee WHERE ROWNUM =N; (N>1)

These won’t work either.

Because row numbers are assigned sequentially to the rows that are fetched and returned.

Which means  that a ROWNUM value is assigned to a row during the predicate evaluation and gets incremented only after a row passes the WHERE clause.

I will explain this based on eg4, where you want ROWNUM to give you the 2nd row only. I will rewrite again for clarity.

SELECT name FROM employee WHERE ROWNUM =2;

The statement grabs the first candidate row and gives it row number 1, which doesn’t match your condition so its thrown away (condition being ROWNUM = 2. But for first candidate row, ROWNUM=1).

Then you get the second candidate row and it’s also given row number 1 (since the previous one was tossed away). It doesn’t match either.

Then the third candidate row … well, I’m sure you can see where this is going now. In short, you will never find a row that satisfies your condition.

Now I hope you guys could explain why ROWNUM > N (where N>0) won’t work either.

How to get around this ?

One way is to have a 3 level nested query:

So for our query in question, that is eg4:

  1. The innermost view should fetch all names from employee table and sort it in order (asc or desc)
  2. The query in the middle level assigns rownum to a real column and gives row numbers to data from the innermost view.
  3. Using the outermost query, you filter out only the data you want based on the rownum.

eg:

SELECT name FROM employee where ROWNUM=3 ORDER BY name;

Which will not work the way you want it to be, unless you rewrite it as below:

SELECT name FROM(SELECT name, rownum as rn from (SELECT name FROM employee ORDER BY name)) where rn=3;

One more solution is to use the Oracle’s built in function: ROW_NUMBER(), which is at least 1000 times slower than the method mentioned above.

Happy Hunting 😉

Digging for vulnerabilities using Rapid 7’s Nexpose

In my last post I explained on how to do a simple scan with Nexpose. No big deal there, as it was just a ‘Discovery scan’ to identify open ports, services and product versions. Even you could accomplish the same using Nmap. But the one we are going to do next is aimed at identifying vulnerabilities, which will definitely be interesting.

Scan with Authentication (target – Linux box):

When we are digging for vulnerabilities in our asset, it’s always good to go with an authenticated scan. Authenticated scan in the sense, we will be providing credentials for NSE to log in to our asset and perform vulnerability checks. This is always the most effective scheme. Most of the steps for the scan are similar compared to the ‘Discovery Scan’. At first you will have to create a site as mentioned in the previous post on Running your first scan with Rapid 7’s Nexpose.

12

The site name is given as ‘Scan_with_authentication’. Furthermore I have added two tags here. You can easily do it by clicking ‘ADD TAGS’ option. You could have custom, location, owner or criticality based tags. ‘metasploitable’ is a custom tag I have added here and ‘backbone’ is a location tag. It allows the ability to provide business context around your assets by applying tags. You can pull out reports based on these tags. Suppose you want a report on all the assets that lie in the backbone, you could use the ‘backbone’ tag to pull the report. Remember that tags are for assets and not sites.

For this scan also we will use the same asset as in the earlier post. So I will be skipping the ‘ASSET’ tab here. We will move on with the ‘AUTHENTICATION’ tab. Go to ‘ADD CREDENTIALS’ tab. Under ‘General’ , I have given a name like ‘login’. Since I’m going to provide the log in credentials of the target asset, I gave its name like ‘login’. Any name will do.

13

Next click over ‘Account’ to provide the user account details for the target asset. Under ‘Service’ choose ‘Secure Shell (SSH)’. This is basically because that I’m well aware my target asset is a Linux box and SSH service is running on it (Information gathered from ‘Discovery Scan’ in our earlier demonstration). The service you choose depends on your target asset. Even though there are other services that runs on my target asset like ‘Telnet’, the reason I choose SSH is that it gives you access to a shell on the target machine (which is a complete access). Your scan results will depend on the service. The more privilege you give to NSE, the more deep it can go and dig for vulnerabilities.

14

You will then have to provide the ‘Username’ and ‘Password’ of an account on the target asset. I have provided ‘msfadmin’ (could be different for you) which is a valid account on the target asset.

15

Nexpose also gives you an option to check whether the credentials you provided are valid. Click on the ‘Test Credentials’ tab. You just have to provide the IP address of the target asset and click ‘TEST CREDENTIALS’ button. You should get a message like ‘Authentication succeeded on 10.179.21.85’ , if the credentials are valid. Then click on ‘CREATE’

16

Move on to ‘TEMPLATES’ tab and choose ‘Exhaustive’. As I have already mentioned, we will be doing a complete vulnerability check on our target asset(s) by doing an exhaustive scan (or you could go with ‘Full Audit without web spider’. It’s up to you to decide on). The checks for ‘Exhaustive’ say ‘Safe only’, which implies we are not going to make any damage. Now click ‘SAVE & SCAN’ button on top.

17

This scan will take a bit of time as compared to the first one we did, since it has to check for all the vulnerabilities on the target. Now if you check for the particular asset under ‘Scan_with_authentication’ site after scan completion, you will see something like

18

We see more information here as compared to the first scan we did. We have a ‘RISK SCORE’ for the asset now (based on vulnerabilities identified). Moreover we can see the ‘HOST TYPE’ , aliases for the asset on left and on right you see the tags we added earlier like ‘metasploitable’ and ‘backbone’. As you scroll further down, you see all the vulnerabilities identified by Nexpose for the particular site. You can see like 322 vulnerabilities in this particular case. If there are exploits already available for the identified vulnerabilities in Metasploit, you will see an ‘M’ icon against that particular vulnerability and a ‘conical flask’ icon if its in exploit-db.

19

At the bottom you can also see a ‘Vulnerability’ which is marked as exception by the Nexpose admin. This is just like the exception list, if you don’t want a vulnerability to come in your reports you could mark it as exception (But this doesn’t mean NSE won’t scan for that particular one next time). If you click on any vulnerability in the above list under Vulnerabilities-> Title, Nexpose will give you details of the vulnerability and also information on how NSE confirmed such a vulnerability is present in the asset. You will also see the ‘Severity’ and ‘CVSS’ score for the vulnerability listed.

20

If you click the ‘back’ button on the browser and scroll down further, you will get to see all the software’s installed on the target asset as well as all the services running on it.

21

Now you see a whole lot of services (37 of them) as compared to our ‘Discovery scan’, and that is the good thing about credentialed scans. Scrolling down further you will see the users and groups on the target as well as the databases.

22


Running your first scan with Rapid 7’s Nexpose

Tags

, , , , ,

Prerequisites – The user of this post is expected to have some knowledge on

  • What the Nexpose tool does?
  • Where it is applicable?

This post is aimed at familiarizing the user with the practical usage of the tool. However we will have a quick look at the architecture of Nexpose.

Nexpose Components

  • Nexpose Security Console
  • Nexpose Scan Engine
  • Nexpose Database
  • Java Expert System Shell
  • Nexpose API

Nexpose Security Console (NSC): NSC is basically the web console through which you can manage your assets, configure and schedule scans, make reports, administration and user management. Accessible by port 3780 by default, but changeable.

Usage : https://[Server IP]:3780/

1The screenshot above shows the login screen of NSC. After you login you will get something like below

2

You can see tabs like Assets, Vulnerabilities, Policies, Reports and Administration on top. Assets are basically the devices that need to be scanned. Every asset is identified by its IP address. Clicking on the ‘Vulnerabilities’ tab gives you all the vulnerabilities that were identified on the assets. We will discuss in detail about the tabs as we progress.

Nexpose Scan Engine (NSE): This is basically the workhorse in Nexpose. This module is responsible for running scans against assets. All communication between NSE and NSC occurs via encrypted SSL sessions. NSC controls scan configuration and scheduling. Updates are pushed from NSC to NSE. NSE basically runs as a service at port 40814 on the server (NSE can be on the same machine where NSC resides or on a different one).

Nexpose Database: Nexpose uses ‘PostgreSQL 9.1.x’ database. It is usually integrated with the console. However no direct access to the database is provided.

Java Expert System (JESS):  This module adds to the intelligence of NSE. It continuously feeds newly discovered information back into the program to dig deeper and identify more vulnerabilities, which further improves the efficiency during the scan process. This also reduces false positives/adverse effects.

Nexpose API: There are two versions for the API. API 1.1/1.2 . The API uses HTTP protocol over SSL, which makes it easy to be integrated in to other applications. Data is transported using XML.

Simple scan using Nexpose (target – Linux box):

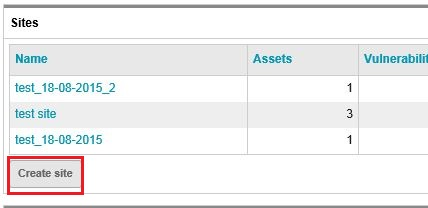
Log in to your Nexpose Security console with valid credentials. At the home page of the console, scroll down and come to the ‘Sites’ table. Click on ‘Create site’.

3

Before you could scan any asset in Nexpose, a site has to be created. A site basically contains

  • Scan target(s) (or assets)
  • Scan template
  • Scan Engine (NSE’s)
  • Scan Schedule (optional)
  • Alerts (optional)
  • Credentials (optional)

After you click ‘Create site’, you will land on a page as shown below.

4

First you have to provide a name for the site. Let it be ‘myfirst_scan’ as for now. When the green tick appears near the name, you are good to go. Now click on the ‘ASSETS’ tab. Here you will have to provide the IP addresses of the assets you want to scan. You can either provide a subnet using the CIDR form (eg: 10.0.0.8/24), provide IP address ranges (eg: 10.0.0.8 – 10.0.0.56) or provide each IP address separated by comma. As of now I have a single asset, which is a metasploitable Linux at 10.179.21.85 (This is basically a virtual machine that has been set up in the cloud for demonstration purpose. You could download a copy of Metasploitable Linux from Metasploitable 2). You will have to just type the IP address of the asset in the field and press ‘Enter’ key. (NB: The IP address of the asset could be different for you)

5

As shown in figure above, the system has accepted the IP address we have provided. We will skip the ‘AUTHENTICATION’ tab for now. Click on the ‘TEMPLATES’ tab.

6

Here you see all of the available scan templates. We have Denial of service, Discovery scan, Discovery Scan – Aggressive, Exhaustive and so on. First let’s keep things simple. We will do a ‘Discovery Scan’. In discovery scan, it first gives out ICMP ping probes to check if the asset is alive or not (Uses TCP/UDP probes if ICMP is blocked). Secondly it does ‘Service Discovery’ (using TCP and UDP packets) to identify all the open ports and the services running on the ports. ‘Checks’ are being disabled, which means no vulnerability checks for now. Click on the ‘ENGINES’ tab now.

7

Choose ‘Local scan engine’ as of now. This is the workhorse for our scan. We have not created any ‘ALERTS’ for now, so we will just skip that as well. ‘SCHEDULE’ is only required if you want to schedule your scan for a later time. Now go ahead and click on ‘SAVE & SCAN’. The scan should start now. You should see a window like below that gives you the progress of the scan.

8

Once the scan gets completed, you will get to see a ‘Completed Successfully’ message under the ‘status’ for your scan. Also you will see the IP address(s) of your asset(s) under ‘Completed Assets’. See the screen below for reference

9

Now if you click on the IP address of your asset under ‘Completed Assets’, it will take you to a page that shows you the results of this particular scan for the asset. You can see that Nexpose has identified the OS to be Ubuntu Linux 8.04.

10

The ‘Vulnerabilities’ table seems empty, since we didn’t ask the tool to dig for vulnerabilities. Also there were no policies selected. But if you scroll down further, you will get to see the services the tool has identified along with the port numbers. As we have mentioned earlier, the purpose of a ‘Discovery Scan’ was to identify these services.

11

The tool identified that the machine at 10.179.21.85 has hosted FTP,SSH,Telnet,SMTP,HTTP and CIFS services. It was also able to identify the product versions in use for these services. Also the ‘Node Fingerprints’ are being listed out with the source that helped to identify each of them.

Wireshark Lab : SSL

Tags

, , ,

1. For each of the first 8 Ethernet frames, specify the source of the frame (client or server),determine the number of SSL records that are included in the frame,and list the SSL record types that are included in the frame. Draw a timing diagram between client and server,withone arrow for each SSL record

selection_024

fig2SSL

2.  Each of the SSL records begins with the same three fields (with possibly different values). One of these fields is “content type” and has length of one byte. List all three fields and their lengths

Content Type: 1 byte

Version          : 2 bytes

Length            : 2 bytes

3. Expand the ClientHello record. (If your trace contains multiple ClientHello records,expand the frame that contains the first one.) What is the value of the content type?

The content type is 22, for Handshake Message, with a handshake type of 01, Client Hello
ssl1
4. Does the ClientHello record advertise the cipher suites it supports? If so, in the first listed suite,what are the public-key algorithm, the symmetric-key algorithm, and the hash algorithm?
The first one uses RSA for public key cryptography, RC4 for the symmetric-key cipher and uses the MD5 hash algorithm.
5. Look to the ServerHello packet. What cipher suite does it choose?
ssl2
The cipher suite uses RSA for public key crypto, RC4 for the symmetric-key cipher and uses the MD5 hash algorithm.
6. Does this record include a nonce? If so,how long is it?What is the purpose of the client and server nonces in SSL?

Yes, this record does include a nonce listed under Random. The nonce is 32 bits long, 28 for data and 4 for the time. The purpose is to prevent a replay attack.

7. Does this record include a session ID? What is the purpose of the session ID?

Yes it does. It provides a unique persistent identifier for the SSL session which is sent in the clear. The client may resume the same session later by using the server provided session ID when it sends the ClientHello.
8. How many frames does the SSL certificate take to send?

SSL certificate takes 8 frames to send.

Creating an SSL Certificate for Apache

Tags

, , ,

Why SSL ?
An SSL certificate is a way to encrypt a site’s information and create a more secure connection. Additionally, the certificate can show the virtual private server’s identification information to site visitors. Certificate Authorities can issue SSL certificates that verify the server’s details, while a self-signed certificate has no 3rd party collaboration. In this tutorial we’ll be focusing on creating a self signed certificate.  Make sure you’ve Apache2 installed. If you haven’t installed one, issue the following at the terminal

sudo apt-get install apache2

Step1 : Creating a self signed certificate

openssl req -new -x509 -days 365 -sha1 -newkey rsa:1024
 -nodes -keyout server.key -out server.crt
 -subj '/O=Company/OU=Department/CN=www.example.com'

Step2: Activating the SSL Module

sudo a2enmod ssl

You should restart the server for the changes to take effect

sudo service apache2 restart

Step3 : Copying the self signed certificate

Make a directory under /etc/apache2

sudo mkdir /etc/apache2/ssl

Copy the server.crt as well as the server.key files that you’ve created into this directory

Step4 : Editing the SSL config file

sudo vim /etc/apache2/sites-available/default

Change the port on the virtual host to 443, the default SSL port

Add the following lines to the configuration file. The lines should go under DocumentRoot

SSLEngine on
 SSLCertificateFile /etc/apache2/ssl/server.crt
 SSLCertificateKeyFile /etc/apache2/ssl/server.key

Step5 : Activating the New Virtual Host

Issue the following command to enable the virtual host

sudo a2ensite default

Make sure you have the following line

Listen 443

in your ports.conf file

Restarting the Apache server will reload it with all changes in place.

sudo service apache2 reload

Go to your preferred web browser and type in https://localhost . You should see something like the below one
<click over the image to get an enlarged view>

apache2

File System Encryption using Truecrypt

Tags

, , , ,

TrueCrypt is a free open source on-the-fly encryption (OTFE) program. Some of its features are:

  • Virtual encrypted disks within files that can be mounted as real disks.
  • Encryption of an entire hard disk partition or a storage device/medium.
  • All encryption algorithms use the LRW mode of operation, which is more secure than CBC mode with predictable initialization vectors for storage encryption.
  • “Hidden volumes” within a normal “outer” encrypted volume. A hidden volume can not be distinguished from random data without access to a passphrase and/or keyfile.

Installation
You can download a 32 bit or 64 bit (Console only) version of the application from the following link.
Download

Creating a normal truecrypt volume

Type the following at the terminal

$ truecrypt -c

After that, you’ll be asked to select a volume type

Volume type:
 1) Normal
 2) Hidden
Select [1]:

Select[1] for a Normal volume.
Then, you’ll be asked to enter the volume path.

Enter volume path: true/protect.dat

Here ‘protect.dat’ is my truecrypt volume, which resides in the ‘true’ folder.
Then you’ll be asked on to provide the volume size.

Enter volume size (sizeK/size[M]/sizeG): 150MB

Enter your preferred size. My choice was a 150 MB volume.
Then you’ve to select between one of the encryption algoriths.

Encryption algorithm:
 1) AES
 2) Serpent
 3) Twofish
 4) AES-Twofish
 5) AES-Twofish-Serpent
 6) Serpent-AES
 7) Serpent-Twofish-AES
 8) Twofish-Serpent
Select [1]:

Then a Hash algorith

Hash algorithm:
 1) RIPEMD-160
 2) SHA-512
 3) Whirlpool
Select [1]:

The file system for the volume has to be selected further

Filesystem:
 1) None
 2) FAT
 3) Linux Ext2
 4) Linux Ext3
 5) Linux Ext4
Select [2]:

Then you’ll be asked to enter a password for the volume. Its recommended you provide a strong password. Something with a mix of alphanumeric characters as well as special characters.

Enter password: ******
WARNING: Short passwords are easy to crack using brute force techniques!

We recommend choosing a password consisting of more than 20 characters. Are you sure you want to use a short password? (y=Yes/n=No) [No]: yes

Re-enter password: ******

Further you’ll be asked to provide a key file(if you have one/ you choose to provide one).

Enter keyfile path [none]:

If you press enter, you’ll move on with the default..that is no key file.That was my choice indeed. Further you’ll be asked on to provide at least 320 random characters. Go attack your keyboard 😛 😀 . I believe they use this as a substitute for the key file.

Please type at least 320 randomly chosen characters and then press Enter:
Characters remaining: 61
Characters remaining: 15

Done: 100.000%  Speed:   42 MB/s  Left: 0 s

As a final step, you’ll be asked to provide your user/administrator password. This is indeed, required to create the file ‘protect.dat’ in your chosen folder.

Enter your user password or administrator password: 
The TrueCrypt volume has been successfully created.

To mount the volume
Use the following command:

truecrypt --mount protect.dat

You’ll be asked to provide a mount directory.

Enter mount directory [default]:

Press enter for default. Further you’ll be asked to provide the password for the volume

Enter password for /home/anonymous/true/protect.dat:

Further on you’ll be asked to provide the keyfile.

Enter keyfile [none]: 

On the next prompt type ‘n’

Protect hidden volume (if any)? (y=Yes/n=No) [No]: n

Then you’ve to provide your user/administrator password, so that..truecrypt could mount the volume

Enter your user password or administrator password: 

That’s all… you could find your truecrypt volume mounted as a drive partition.
To dismount the volume, type:

truecrypt -d

Thank you….. 🙂

Netcat vs Ncat

Ncat is meant to be a modern implementation of Netcat using Nmap’s mature networking libraries, combining the best features of the various Netcat derivatives into one new tool. While Ncat is an extremely versatile tool with many amazing new features, it is not quite 100% reverse-compatible with the original Netcat.

Some of the new features in Ncat compared to the original Netcat are:

-> IPv6 Support
-> Support for SSL
-> Proxy support
-> Ability to chain Ncat’s together
-> Ability to specify specific hosts to allow or deny access to in listen mode

Implementing chat using Netcat:

Suppose you have two hosts. Host A and Host B. Both of them should have Netcat being installed, before we could do anything about it.

Installing netcat on Debian flavours:

$ sudo aptitude install netcat

Installing Netcat on Fedora:

$ sudo yum install netcat

or you could install using their RPM packages.

After installation, and before we could start our chat session. One of the Host’s should be made the server. It is called the server, since it has to listen on one of its local ports for connections from other netcat hosts.

Suppose we use Host A as the server. Issue the following command at Host A’s terminal

$ nc -l -p  <local_port_number>

-l signifies listen
-p for the port number

NB: Use a port number above 1032

Suppose Host A’s IP is 10.10.10.35 and Host B want to communicate with Host A via Netcat. Issue the following command at Host B’s terminal.

$ nc 10.10.10.10  <local_port_number>

That’s all required. Now both parties can chat.